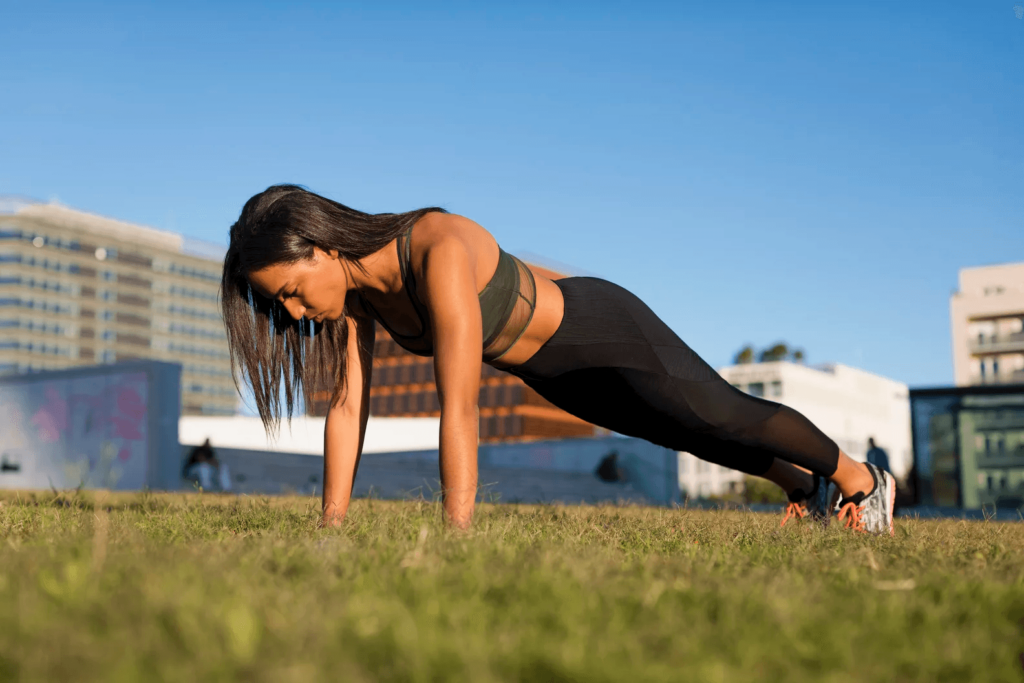
The push-up is one of the best exercises on the planet.
It’s a foundational movement in strength training, and an exercise EVERYBODY should be doing regularly.
However, it’s also an exercise that about 95% of people get wrong and do incorrectly.
Fortunately, after reading today’s ultimate guide, you’ll know exactly how to do a proper push-up with correct form:
- How to set up for a proper push-up (initial staging).
- How to do a push-up (correct push-up form with video).
- How do you train to do push-ups? (Where to start if you can’t do a push-up.)
- What are some different types of push-ups? (advanced push-up variations)
- How to get better at push-ups.
Toronto personal Trainer will guide you through a workout routine that can be done anywhere, all while creating your very own superhero!
How to Set up for a Proper Push-up (Staging)
When it comes to push-ups, maintaining proper form is crucial. Each push-up should adhere to the correct technique to ensure consistent measurement of your total reps in each workout session.
If, for instance, you did 20 push-ups two days ago, and today you managed 25 push-ups but compromised on form by not going all the way down or lifting your hips too high, it becomes impossible to accurately gauge any improvement in strength.
Here’s a guide on achieving the correct push-up position:
1) Start by positioning your hands on the ground slightly wider than shoulder-width apart.
Make sure there’s a straight line from your chest or nipple down to the floor, aligning it directly over your thumbnail.
Depending on your strength and experience, angle your hands comfortably.
For example, you might find it suitable to have your middle finger pointing straight up and away from you.
2) If you experience wrist discomfort due to poor flexibility, consider using push-up handles or a bar to grip while doing push-ups.
Alternatively, you can opt for doing push-ups on your knuckles, especially on a semi-soft surface like grass or carpet.
3) Arrange your feet in a position that feels comfortable and balanced to you. This could range from shoulder-width apart to having your feet touching. Generally, a wider stance provides better stability during push-ups.
4) Maintain a straight line from the top of your head down to your heels, envisioning your body as a single straight line. Avoid sticking your buttocks up in the air or allowing them to sag. Essentially, you should sustain a plank-like posture throughout the entire movement.
5) Focus on engaging your core by clenching your buttocks and tightening your abs, creating a straight line with your body. This adjustment may be significant if you’ve been doing push-ups incorrectly. Consider recording a video of yourself to ensure you’re executing the movement correctly.
6) Keep your head slightly lifted, looking slightly ahead rather than straight down. This positioning helps maintain proper body alignment, although you can look down if it aids your concentration.
7) At the top of each push-up, ensure your arms are fully extended, supporting your weight, and you’re prepared to begin the descent for the next push-up.
8) Emphasize the importance of the initial hand placement: many individuals tend to position their arms too wide, with shoulders flared out.
Correctly, your arms and body should form an arrow, not a T, when viewed from above.
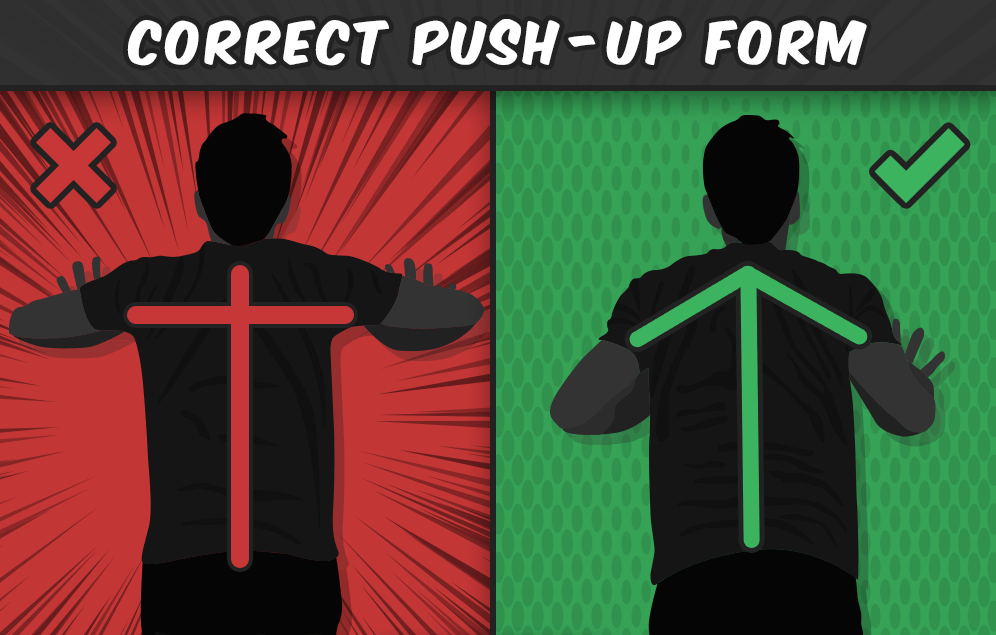
Be aware that transitioning to proper form from previously incorrect arm positioning will increase the level of difficulty in performing push-ups.
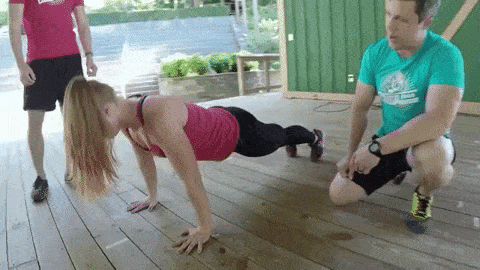
How to Do a Proper Push-Up (Correct Push-Up Form with Video).
In the 3-minute “Perfect Push-Up” video above, we take you through EACH of the steps of a push-up.
HERE’S HOW TO COMPLETE ONE PERFECT REPETITION OF A PROPER PUSH UP:
- With your arms straight, butt clenched, and abs braced, steadily lower yourself until your elbows are at a 90-degree angle or less. Depending on your level of experience, age, and flexibility, 90 degrees might be the lowest you’re able to go. Personally, I like to go down until my chest (not my face), hits the floor. That way, I know I’m going the same distance each and every time.
- Try not to let your elbows go flying way out with each repetition. Keep them relatively close to your body, and keep note of when they start to fly out when you get tired.
- Once your chest (or nose/chin) touches the floor (or your arms go down to a 90-degree angle), pause slightly and then explode back up until you’re back in the same position.
Do as many as you can until you start to feel your form slip (even slightly); you are done for that set.
HERE’S WHY YOU SHOULD FOCUS ON FORM OVER QUANTITY:
- 10 good push-ups and 5 crappy ones are tough to quantify against eleven good push-ups.
- If you can only do 10 of something, write down your results and aim for 11 next time.
- Perfect form allows you to keep track of your improvements week over week.
Want to know where push-ups should fall into your workout routine?
How Do You Train to Do Push-Ups? (Where to Start If You Can’t Do a Push-Up.)
Don’t be discouraged if you’re unable to perform a push-up just yet. We’ve laid out a strategic plan in the video above that will guide you towards achieving this goal.
Begin with a simpler pushing movement and gradually progress to more challenging variations, ultimately leading to the execution of standard push-ups. This precise approach is outlined in our guide titled “Achieve Your First Push-up!”
We’ll advance through four levels of push-ups:
- Level 1 – Wall Push-Ups
- Level 2 – Elevated Push-Ups
- Level 3 – Knee Push-Ups
- Level 4 – Regular Push-Ups.
Level 1: Wall Push-Ups
Stand facing a wall and clench your buttocks, engage your abs, placing your hands on the wall slightly wider than shoulder-width apart.
Step back with your feet until your arms are fully extended, supporting your weight. A single step back with both feet is usually sufficient.
Maintaining a straight body line, slowly lower yourself towards the wall until your nose is almost touching it. Push back up to the starting position.
How to Train Wall Push-Ups:
Perform 4 sets of wall push-ups with a 2-minute rest between sets, every other day. Record the number of repetitions you can complete with proper form for each set in a notebook. Once you can achieve 4 sets of 20 proper form repetitions, you’re ready to progress to knee push-ups.
Level 2: Elevated Push-Ups
Elevate your hands on a surface like a park bench or picnic table, ensuring it’s at a suitable height based on your strength and experience.
Perform push-ups in this elevated position.
How to Train Elevated Push-Ups:
Complete 4 sets of elevated push-ups with a 2-minute rest between sets, every other day. Keep track of the number of proper form repetitions for each set. Once you can achieve 4 sets of 20 repetitions, you can transition to regular push-ups, knee push-ups, or a lower hand elevation.
To progress, attempt elevated push-ups on stairs in your house. As you gain strength, move your hands to lower steps until they’re on the ground.
Level 3: Knee Push-Ups
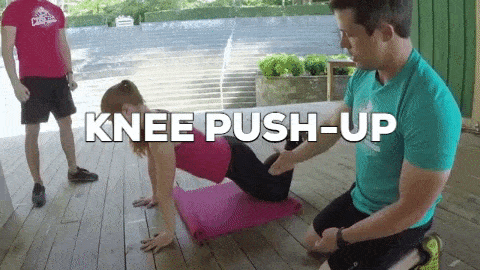
Assume the push-up position with your hands and shoulders aligned, but stabilize yourself on your knees instead of your feet.
How to Train Knee Push-Ups:
Once you can complete 4 sets of 20 repetitions on your knees, you can start considering regular push-ups.
In summary, if you’re unable to perform a standard push-up, progress through the following levels:
- Wall Push-Ups: Level 1
- Elevated Push-Ups: Level 2
- Knee Push-Ups: Level 3
- Regular Push-Ups: Level 4
This progression plan has proven effective and is the same strategy we employ to help individuals master push-ups.
What Are Other Types of Push-Ups? (Push-Up Variations)
Basic push-ups can get boring…
Fortunately, there are dozens upon dozens of variations to make things more difficult for you.
Once you’re cranking out perfect form push-ups like it’s your job, try some of these advanced variations on for size.
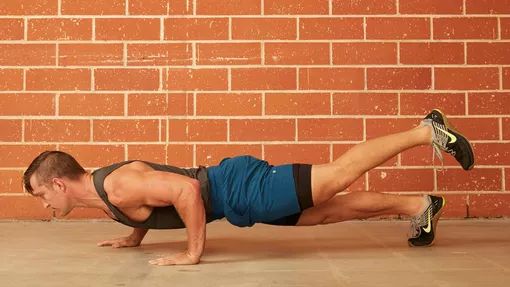
1) One-legged Push-ups: introducing some variety and balance by removing one of your legs for less stabilization.
2) Side-to-Side Push-Ups – Get into the classic push-up position and move your hands farther apart. Now, lower yourself down towards one arm only – you should feel like you’re supporting a lot of your weight.
To complete the rep, slide horizontally over to the other arm, and push-up. The farther apart your hands, the higher percentage of your bodyweight will be supported by that side of your chest/shoulder and arm (thus getting harder)!
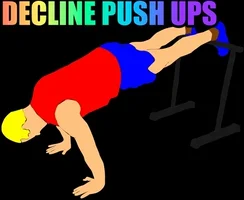
3) Decline Push-Ups – these work your shoulders and triceps more so than normal push-ups.
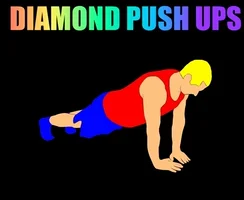
4) Diamond Push-Ups – keep your arms tight at your side, rotate your hands outward, and keep your elbows tight as you lower your body. Works your triceps like crazy.
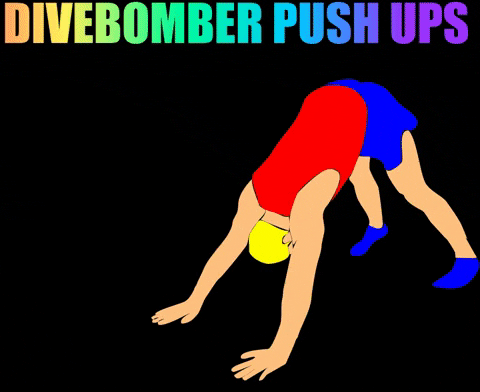
5) Dive-Bomber Push-Ups – funky, difficult, but oh so fun.
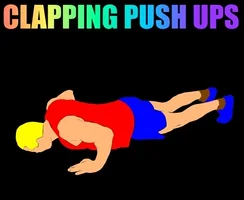
6) Clapping Push-Ups – these are brutal and will wear you out just after a few repetitions. Just don’t hurt yourself and smash your face during a failed attempt (not that I’ve ever done that.
7) Handstand Push-Ups – This goes without saying, but you should be able to do a proper handstand before attempting these!
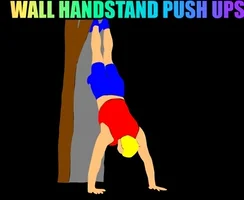
Kick up against a wall, and without flailing your elbows way out to the side (which can wreak havoc on your shoulders and elbow joints), slowly lower yourself down until your head touches the ground softly.
Then raise yourself back up.
Rotate some of these advanced push-ups into your workout routine and you’ll be well on your way to a great strength training practice.
How to Get Better at Push-Ups
You’ve acquired the technique for performing a push-up and can do a few reps, but now you’re aiming for improvement!
Here are several pointers to assist you on your journey:
- Prioritize Your Health: Achieving better push-ups is significantly influenced by your overall health. Weight loss, primarily achieved through a well-balanced diet (which constitutes 80% of the effort), reduces the weight you have to lift during push-ups, making them more manageable. If weight loss has been a challenge for you, our article “Struggling with Weight Loss? Discover the Reasons” can provide valuable insights.
- Maintain Proper Form: Avoid compromising on form, especially during the final push-ups when fatigue sets in. A few poorly executed push-ups can halt your progress. Complete your sets with good form, record your numbers, and strive to surpass them in your next session.
- Rest and Recovery: When initiating your push-up routine, refrain from doing push-ups consecutively for two days. Your muscles need time to recuperate and rebuild. Allow a minimum of 48 hours between push-up sessions. As you progress and push-ups become a warm-up, daily sessions can be considered. For those at an advanced level, a Progressive Load Progression (PLP) program could be an option.
- Protein Intake: After completing your workout, ensure adequate protein consumption. Protein aids in muscle recovery and growth, essential after the muscle breakdown that occurs during push-ups. For tips on boosting your protein intake, consult our comprehensive protein guide.
- Explore Variations: If you can effortlessly perform 4 sets of 20-25 push-ups with impeccable form, it’s time to diversify your routine with push-up variations. Keeping your workouts engaging helps sustain motivation and challenges your muscles in new ways.
- Strengthen Your Core: Incorporate planks into your routine to fortify your core. A strong core ensures it doesn’t become the weak link when maintaining proper push-up form.
Incorporating these six tips into your strength training plan will yield significant benefits. Stay committed, and soon enough, you’ll be mastering one-arm push-ups like Batman.